HOME
Open Dreamweaver and choose HTML. Then go to ‘manage sites’ (which towards the bottom in the right hand side column) and click new. This then leads you to a page that allows you to create the site name and choose a folder for the site to be. When writing the site name and folder, words must not have spaces between them; ways of doing this would be as such: GCD_site/GCD-site/ or GCD.SITE – etc.
Once you have done that, the folder you just created should appear below; right click this and go to new folder – name this folder ‘images’. This creates a folder within a folder; makes it easier for you to find certain files. Once this is done save the document under ‘index.HTML’.
Right clicking on the page gives a list of many options. Clicking ‘page properties’ at the bottom, brings up a box which includes appearance options. This allows you to change the colour of the text, of the links, of the background, choosing a font to choosing whether or not you want your image to be repeated all over the page (and many more).
The next stage was uploading my image; for this I went to ‘page properties > browse’. This uploads the image as part of the background. Now that I have my image, I need to add in text – you simply click on the page to start typing.
On the top left hand side of the page there is something that says ‘code’ ‘split’ and ‘design’. By pressing on code you can see all the actions you have applied to your page in coding, by pressing on split you can see both code and the design you’re working on; finally by pressing design it simply shows the page you are working on.
When the link changes colour and I know it’s working, I go back to my second page. This time instead of me using text as a base to link to another page, I used the uploaded image. For this I click on the image and also go to ‘link’ at the bottom of the page. I use the same process to find the ‘index.HTML’ file, once found I press ok. To show that the image(s) works it a blue border surrounds it.
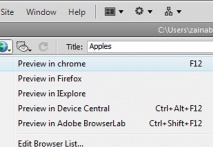
The only thing left to do know is to preview it online. To do this you must click on the small icon of the globe – this comes up with the internet pages you can view it on, whether it be Firefox, Google chrome etc.
I also recorded my process which can be found below.

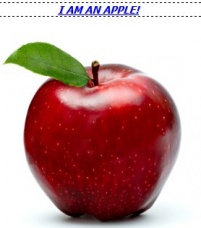
I then created a new page - click on file > new > HTML > . I repeated the process by going to; ‘manage sites’ and ‘new’ - although this time I changed the site name to a different name as well as a different site folder (because I’m working on a different page). The site name can be anything as long as the words have no spaces between them (as discussed above). Once that was done I right clicked the folder to create a new folder – ‘images’. I then went to insert > image and chose the image I needed. Once it hadsloaded you will realise the picture should include a border around it.
At first you realise that the image cannot be moved around the page but in order to do so, you have to – insert > table. Choose the amount of columns and rows you want (depending on the amount of images you want to add); then drag the picture into the table – this allows you to change the size of the image and move it (within the table).
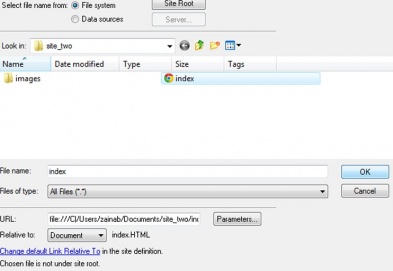
Now that I have the images I needed, I went back to the first page I created, and highlight the text in order to link it to the 2nd page. At the bottom of the screen you go to ‘link’ and browse through the second page's folder to find ‘index.HTML’. Once found, select it and press ok. By doing this you are allowing the text on the first page link to the second. The text will automatically change colour on the page to a traditional blue hyperlink colour. Dreamweaver does this in order to show that the link is working.
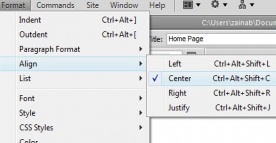
By going to – Format > Align, you can change were you want the text to be placed on the page. You can do the same with an image – options for this can be found at the bottom of the screen n the properties tab.


Hotglue
DREAMWEAVER & HOTGLUE
Zainab Itani